Creating your own board game has never been easier thanks to digital design tools. How to make a board game in photoshop is a question I get asked constantly, and for good reason. Photoshop gives you incredible control over every visual element of your game design, from the board layout to custom game pieces.
In this comprehensive guide, as a professional custom board game manufacturer, I’ll walk you through the entire process of designing a professional-looking board game using Adobe Photoshop. Whether you’re a complete beginner or have some design experience, you’ll learn exactly how to bring your game concept to life.

Why Use Photoshop for Board Game Design?
Before we dive into the nitty-gritty, let me explain why Photoshop is such a powerful choice for game design.
Unlike simple drawing programs, Photoshop offers:
- Layer-based editing that lets you easily modify individual elements
- Advanced text tools for creating clear, readable game instructions
- Professional color management for accurate printing
- Precise measurement tools for consistent spacing and alignment
- Filter effects to create stunning visual elements
That said, there’s a learning curve. But once you master the basics, you’ll have a design tool that can handle anything your imagination throws at it.
How to Make a Board Game in Photoshop
Setting Up Your Photoshop Workspace
First things first: you need to set up your file correctly. This might seem boring, but trust me – getting this right upfront will save you hours of headaches later.
Creating Your Game Board File
Here’s exactly how to set up your main board file:
- Open Photoshop and go to File > New
- Set dimensions to 12″ x 18″ (standard board game size)
- Set resolution to 300 DPI for print quality
- Choose CMYK color mode if you plan to print professionally
- Name your file something like “GameBoard_v1”
Pro Tip: Always work at 300 DPI or higher. You can always scale down for digital use, but you can’t add detail that wasn’t there originally.
Organizing Your Layers
From day one, use a systematic approach to layer organization:
- Background Layer: Your base colors and textures
- Path Layer: The game path or track
- Text Layers: All game text and instructions
- Components Layer: Game pieces, tokens, and markers
- Effects Layer: Shadows, highlights, and special effects
Planning Your Game Design
Before you start clicking around in Photoshop, you need a solid plan. I’ve seen too many people jump straight into design without thinking through the fundamentals.
Define Your Game Concept
Ask yourself these key questions:
What’s the theme? Pirates, space exploration, medieval kingdoms? Your theme drives every visual decision.
How many players? This affects the size and complexity of your board layout.
What’s the objective? Racing to the finish, collecting resources, or strategic conquest?
What components do you need? Cards, dice, tokens, player pieces?
Sketch Your Layout
Even if you’re not an artist, grab a pencil and paper. Sketch out:
- The overall board shape
- Start and finish positions
- Path or movement areas
- Special spaces or zones
- Where text and instructions will go
This rough sketch becomes your roadmap in Photoshop.
Creating the Game Board Background
Now for the fun part – actually designing your board.
Building Your Base
Start with your background layer:
- Fill with base color: Use the Paint Bucket Tool (G) to fill your canvas
- Add texture: Go to Filter > Noise > Add Noise for subtle texture
- Apply gradients: Use the Gradient Tool (G) for depth and visual interest
For example, if you’re creating a pirate-themed game, you might use:
- Sandy beige base color
- Subtle paper texture overlay
- Darker edges to simulate aging
Adding Thematic Elements
This is where your game starts coming to life. Use Photoshop’s shape tools and brushes to add:
- Terrain features (mountains, rivers, forests)
- Buildings or landmarks
- Decorative borders
- Background patterns
Remember: These elements should enhance gameplay, not distract from it. Keep important game spaces clearly visible.
Designing the Game Path
The path is the backbone of most board games. Here’s how to create paths that are both functional and beautiful.
Using Shape Tools for Precision
For geometric paths:
- Select the Rectangle Tool (U)
- Set to “Shape” mode in the options bar
- Create uniform squares or rectangles for spaces
- Use guides (View > New Guide) for perfect alignment
Creating Curved Paths
For more organic, winding paths:
- Use the Pen Tool (P) to create smooth curves
- Right-click and choose “Stroke Path”
- Select your brush size and color
- Apply layer styles for depth (Drop Shadow, Bevel & Emboss)
Path Spacing and Sizing
Here’s what I’ve learned from analyzing dozens of successful board games:
- Minimum space size: 0.5″ x 0.5″ for easy piece placement
- Consistent spacing: Use Photoshop’s alignment tools religiously
- Clear direction: Add subtle arrows or visual flow indicators
Adding Game Text and Instructions
Text can make or break your game design. Poor typography confuses players and kills the game experience.
Choosing the Right Fonts
Stick to these principles:
Readability first: Sans-serif fonts like Arial or Helvetica for instructions
Theme consistency: Decorative fonts for titles that match your theme
Size matters: Minimum 12pt for body text, 18pt+ for important information
Text Placement Strategy
Follow this hierarchy:
- Game title: Largest, most prominent
- Space instructions: Medium size, high contrast
- Flavor text: Smaller, can be stylized
- Fine print: Legal size but still readable
Pro Tip: Use Photoshop’s Character panel (Window > Character) to fine-tune letter spacing and line height for professional results.
Creating Game Components
Beyond the board itself, you’ll need various game pieces and components.
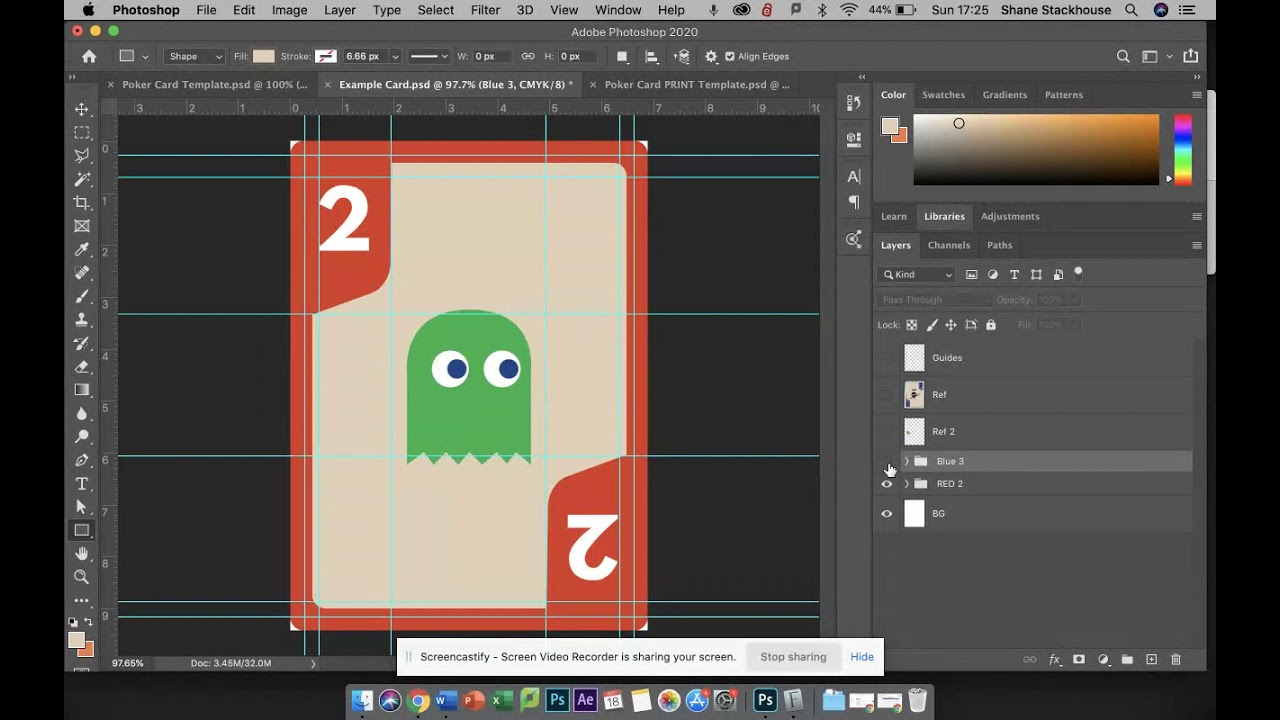
Designing Game Cards
Cards are often the trickiest component because they need to be:
- Consistently sized (2.5″ x 3.5″ is standard)
- Easy to read
- Visually appealing
- Print-friendly
Create a card template:
- New document: 2.5″ x 3.5″, 300 DPI
- Add guides for safe margins (0.125″ from edges)
- Create your layout with placeholders for:
- Card title
- Main artwork
- Text content
- Cost/value indicators
Custom Game Pieces and Tokens
Use Photoshop’s 3D capabilities or create flat designs:
For flat tokens:
- Create circular or square shapes
- Add icons or numbers
- Use layer styles for dimensional appearance
For 3D-style pieces:
- Use Filter > Render > Lighting Effects
- Apply Bevel & Emboss layer styles
- Add realistic shadows
Color Theory for Board Games
Color isn’t just about making things look pretty – it’s a crucial gameplay element.
Functional Color Usage
Player identification: Each player needs distinct colors that are:
- Easily distinguishable
- Colorblind-friendly
- Consistent across all components
Information hierarchy: Use color to indicate:
- Different types of spaces
- Difficulty levels
- Resource categories
- Action types
Technical Color Considerations
For print production:
- Work in CMYK color mode
- Avoid pure blacks (use rich black: C:75, M:68, Y:67, K:90)
- Test print early and often
For digital play:
- RGB mode is fine
- Ensure sufficient contrast for screen viewing
- Consider how colors look on different devices
Preparing Files for Production
You’ve designed an amazing game, but now you need to get it printed properly.
Print-Ready File Setup
Bleed and trim marks:
- Go to Image > Canvas Size
- Add 0.25″ to each dimension for bleed
- Extend your background to fill the bleed area
- Add crop marks using guides
File formats:
- PDF: Best for professional printing
- PNG: Good for print-on-demand services
- JPEG: Acceptable but may lose quality
Working with Print Services
Most print services prefer:
- 300 DPI resolution minimum
- CMYK color mode
- PDF format with embedded fonts
- Separate files for different components
Pro Tip: Always order a proof copy before committing to a large print run. Colors and sizing can look different on paper than on your screen.
Testing and Iteration
Here’s something most tutorials skip: your first design won’t be perfect. And that’s totally normal.
Prototype Testing
Print your game on regular paper first:
- Test readability at actual size
- Check if game pieces fit properly on spaces
- Verify that all text is legible
- Look for visual balance issues
Getting Feedback
Show your prototype to potential players:
- Can they understand the rules from the visual design alone?
- Are any elements confusing or unclear?
- Does the visual theme enhance the gameplay?
Digital Refinement
Based on feedback, refine your design:
- Adjust font sizes for better readability
- Modify colors for better contrast
- Reposition elements for improved flow
- Simplify overly complex areas
Advanced Photoshop Techniques for Game Design
Once you’ve mastered the basics, these advanced techniques can take your game to the next level.
Using Smart Objects
Smart Objects let you:
- Resize elements without quality loss
- Apply non-destructive filters
- Update multiple instances simultaneously
Batch Processing
For games with many similar elements (like cards), use:
- Actions to record repetitive steps
- Batch processing to apply changes to multiple files
- Variables for data-driven graphics
Custom Brushes and Patterns
Create unique visual elements:
- Design custom brushes for terrain features
- Develop seamless patterns for backgrounds
- Build icon libraries for consistent symbols
Common Mistakes to Avoid
After years of helping people with game design, I see the same mistakes repeatedly:
Design mistakes:
- Making text too small
- Using low contrast color combinations
- Overcrowding the design with unnecessary elements
- Inconsistent spacing and alignment
Technical mistakes:
- Working at too low resolution
- Forgetting to leave bleed areas
- Not testing print colors
- Mixing color modes within the same project
Workflow mistakes:
- Not organizing layers properly
- Skipping the prototype phase
- Not backing up work frequently
- Ignoring player feedback
Conclusion
Learning how to make a board game in photoshop opens up incredible creative possibilities. With the techniques I’ve outlined here, you have everything you need to create professional-quality games that players will love.
Remember, great game design is iterative. Your first attempt might not be perfect, but each revision teaches you something new. Focus on clear communication, consistent visual hierarchy, and always prioritize the player experience.
The most important step? Just start. Pick a simple concept, fire up Photoshop, and begin experimenting. You’ll be amazed at what you can create when you combine solid design principles with Photoshop’s powerful tools.
Whether you’re designing a quick family game or planning the next board game sensation, mastering how to make a board game in photoshop gives you the foundation to bring any gaming vision to life.


