How to design a board game on the computer has become one of the most frequently asked questions in the tabletop gaming community. And for good reason.
Gone are the days when you needed physical cardboard, scissors, and glue to bring your game ideas to life. Today’s digital tools make it easier than ever to create, test, and refine your board game concepts without leaving your desk.
In this comprehensive guide, as a professional custom board game manufacturer, I’ll walk you through everything you need to know about digital board game design. From choosing the right software to creating your first playable prototype, you’ll have all the tools you need to turn your gaming ideas into reality.

Why Design Board Games Digitally?
Before we dive into the how-to, let’s talk about why digital board game design is such a game-changer (pun intended).
Speed and Efficiency
Traditional board game prototyping can take weeks. You design components, print them out, cut everything by hand, and glue pieces together. With digital tools, you can create and modify game elements in minutes, not hours.
Cost-Effective Testing
Physical prototypes cost money every time you make changes. Digital prototypes? You can iterate infinitely without spending a dime on materials.
Global Playtesting
Here’s something that really gets me excited: you can playtest your game with people from around the world. No need to organize local game nights or mail prototypes to testers.
Professional Polish
Even your early prototypes can look professional with the right digital tools. This makes it easier to get feedback and potentially attract publishers.
Board Game Design Resource
Essential Software for Digital Board Game Design
Let’s start with the tools you’ll need. The good news? You don’t need to break the bank to get started.
Graphics and Design Software
Adobe Creative Suite
If you’re serious about board game design, Adobe’s suite is the gold standard. Here’s what each program brings to the table:
- Photoshop: Perfect for creating artwork, editing images, and designing complex visual elements
- Illustrator: Ideal for creating vector graphics, icons, and scalable artwork
- InDesign: The best choice for laying out cards, rulebooks, and other text-heavy components
The downside? It’s expensive. Adobe’s subscription model can add up quickly.
Affinity Suite
This is my go-to recommendation for beginners. Affinity offers:
- One-time purchase (no subscription fees)
- Nearly as powerful as Adobe
- More user-friendly interface
- Excellent value for money
Free Alternatives
Don’t have budget for premium software? No problem:
- GIMP: Free alternative to Photoshop
- Inkscape: Free vector graphics editor
- Canva: Browser-based design tool with templates
Specialized Board Game Design Tools
Component.Studio
This tool was specifically built for board game designers. It’s data-driven, meaning you can connect your designs to spreadsheets and automatically generate multiple cards or tokens.
Key features:
- Templates for cards, boards, and tokens
- Google Sheets integration
- Export to multiple formats
- Built-in Tabletop Simulator support
nanDECK
If you’re comfortable with a bit of coding, nanDECK is incredibly powerful for card design. It uses simple scripts to generate large numbers of cards automatically.
Digital Prototyping Platforms
Tabletop Simulator
This is where the magic happens for digital playtesting. Tabletop Simulator lets you:
- Import your custom game components
- Play with friends online
- Test game mechanics in real-time
- Make adjustments on the fly
Tabletopia
Browser-based platform that’s perfect for:
- Cross-platform compatibility
- Easy sharing with playtesters
- Professional presentation
- No software installation required
Screentop.gg
A newer platform that’s gaining popularity for its:
- Intuitive interface
- Multiple table support
- Free tier for small projects
- Easy setup process
How to Design a Board Game on the Computer?
Now let’s get into the meat and potatoes of actually designing your game digitally.
Step 1: Concept Development and Documentation
Before you touch any design software, you need a solid foundation. I recommend starting with a simple text document that outlines:
- Game theme and setting
- Target audience and player count
- Core mechanics and gameplay loop
- Victory conditions
- Estimated play time
Pro Tip: Use Google Docs or Notion for this stage. You’ll want to share your concept with others for feedback, and cloud-based tools make collaboration easier.
Step 2: Creating Your First Digital Components
Cards
Most board games include cards, so let’s start there. Here’s my recommended workflow:
- Create a template in your chosen graphics software
- Set up proper dimensions (standard playing cards are 2.5″ x 3.5″)
- Design with bleeds (extra space around edges for printing)
- Use consistent typography and color schemes
- Create a master file with all card layouts
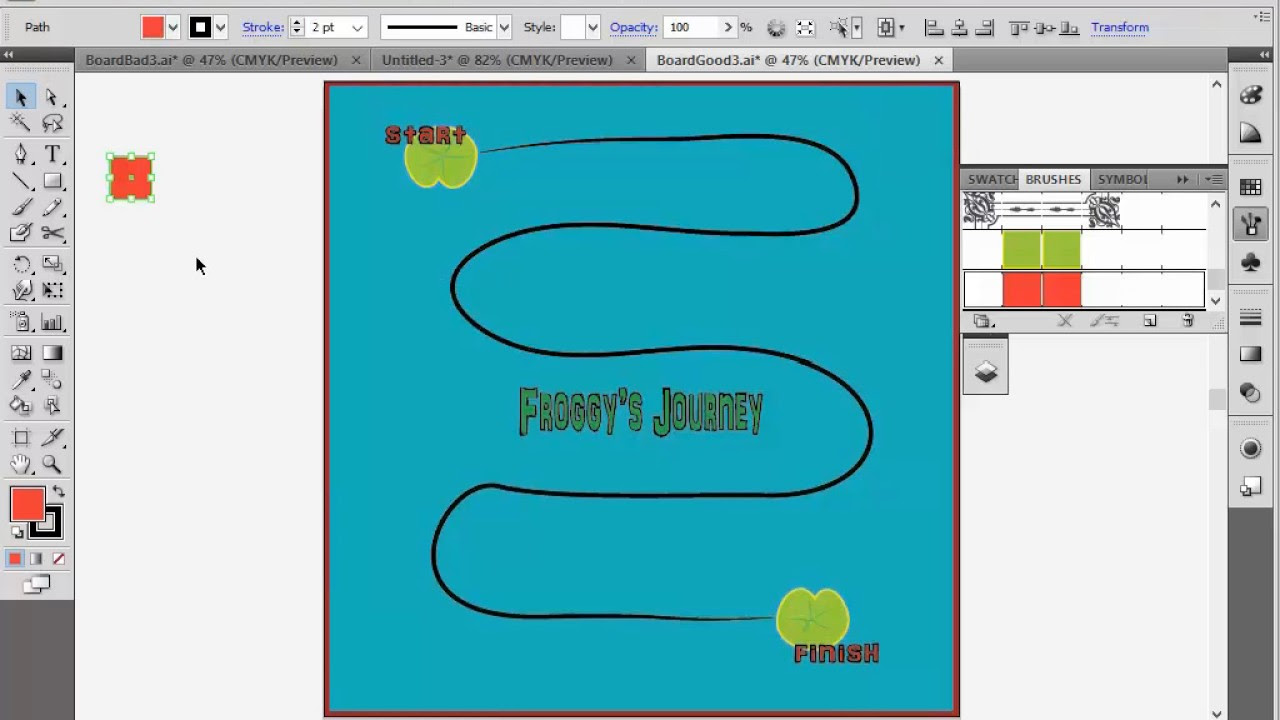
Game Board
For board design:
- Start with graph paper templates
- Use layers to separate different elements
- Keep important elements away from fold lines
- Consider how the board will be manufactured
Tokens and Pieces
Digital tokens are incredibly versatile:
- Create different shapes and colors
- Use icons for quick identification
- Design multiplier tokens to save space
- Consider colorblind-friendly palettes
Step 3: Setting Up Your Digital Prototype
Once you have your components designed, it’s time to bring them into a digital environment.
Tabletop Simulator Setup
- Create a new workshop item
- Upload your component images
- Set up the game table
- Add scripting for automated setup (optional)
- Test everything works correctly
Tabletopia Setup
- Create a new game project
- Upload and configure your objects
- Set up game setups for different player counts
- Create detailed setup instructions
- Publish for testing
Step 4: Organizing Your Design Files
Here’s something most people don’t think about until it’s too late: file organization.
Create a folder structure like this:
Game_Name/
├── Assets/
│ ├── Cards/
│ ├── Boards/
│ ├── Tokens/
│ └── Artwork/
├── Prototypes/
├── Rules/
├── Playtesting/
└── Archive/
Trust me on this one. You’ll thank yourself later when you’re not hunting through hundreds of files looking for that one card design.
Advanced Digital Design Techniques
Once you’ve mastered the basics, these advanced techniques will take your designs to the next level.
Data-Driven Design
Instead of manually creating each card, use spreadsheets to drive your design process:
- Create a master spreadsheet with all card data
- Use mail merge or specialized tools to generate cards automatically
- Make changes in the spreadsheet and regenerate instantly
- Maintain consistency across all components
Version Control
As your game evolves, keeping track of changes becomes crucial:
- Use descriptive file names (GameName_v1.2_Cards.psd)
- Keep a changelog document
- Archive old versions instead of deleting them
- Use cloud storage with version history
Automated Testing
Set up automated playtesting scenarios:
- Create scripted bot players in Tabletop Simulator
- Test edge cases and unusual combinations
- Verify game balance through simulation
- Identify potential exploits or broken strategies
Playtesting Your Digital Prototype
Here’s where digital design really shines. You can get feedback faster and from more people than ever before.
Finding Playtesters
Online Communities
- Board Game Design Lab Facebook group
- Reddit communities like r/tabletopgamedesign
- Discord servers for game designers
- BoardGameGeek forums
Local Groups
- Meetup groups for board game designers
- Local game stores with designer nights
- University game design clubs
- Friends and family (for initial testing)
Collecting Feedback
Create structured feedback forms:
- Rate different aspects of the game (1-10 scales)
- Ask specific questions about mechanics
- Request suggestions for improvement
- Track which rules caused confusion
Iterating Based on Feedback
The beauty of digital design is rapid iteration:
- Identify the most common complaints
- Brainstorm solutions
- Implement changes digitally
- Test again immediately
- Repeat until the game feels right
Preparing for Production
Once your game is tested and refined, you’ll want to prepare it for potential publication.
Print-and-Play Files
Create high-quality print-and-play versions:
- Use standard paper sizes (8.5″ x 11″)
- Include clear cutting guidelines
- Provide both color and black-and-white versions
- Create detailed assembly instructions
Print-on-Demand Services
Consider services like:
- The Game Crafter: Full-service board game printing
- PrintPlayGames: Specialized in game components
- DriveThruCards: Card printing and fulfillment
- Local print shops: For small runs and prototypes
Publisher-Ready Files
If you’re pitching to publishers:
- Provide files in multiple formats (PDF, PNG, AI)
- Include source files with organized layers
- Create a style guide documenting fonts, colors, and layouts
- Prepare a sell sheet summarizing your game
Common Mistakes to Avoid
After years of seeing game designs, here are the biggest mistakes I see people make:
Overcomplicating Early Prototypes
Your first digital prototype doesn’t need to be beautiful. Focus on functionality over aesthetics initially.
Ignoring File Management
Poor organization will bite you later. Set up good habits from day one.
Skipping the Printing Test
Always print out your digital designs to see how they look physically. Colors and sizes can be deceiving on screen.
Not Considering Colorblind Players
Use colorblind-friendly palettes and don’t rely solely on color to convey information.
Forgetting About Manufacturing Constraints
Design with real-world production in mind. That intricate die-cut shape might look cool but could be impossible to manufacture affordably.
Final Thoughts
Learning how to design a board game on the computer opens up incredible possibilities for game creators. The tools available today would have been unimaginable just a decade ago, and they’re only getting better.
The key is to start simple, focus on gameplay over graphics initially, and iterate based on feedback. Don’t get caught up in making everything perfect from the start – the beauty of digital design is that nothing is ever truly final.
Whether you’re creating your first game or your fiftieth, the computer-based approach will save you time, money, and frustration while giving you access to a global community of players and designers.
Remember: the best board game design software is the one you’ll actually use consistently. Start with free tools if budget is a concern, but don’t let perfect be the enemy of good. Your game idea deserves to be brought to life, and now you have the knowledge to make it happen.
So fire up that computer, open your design software of choice, and start creating. The board gaming world is waiting for your next great idea, and with these digital tools at your disposal, there’s never been a better time to learn how to design a board game on the computer.


